

How to knit an I-cord or big yarn for finger or arm knitting
/The big knitting
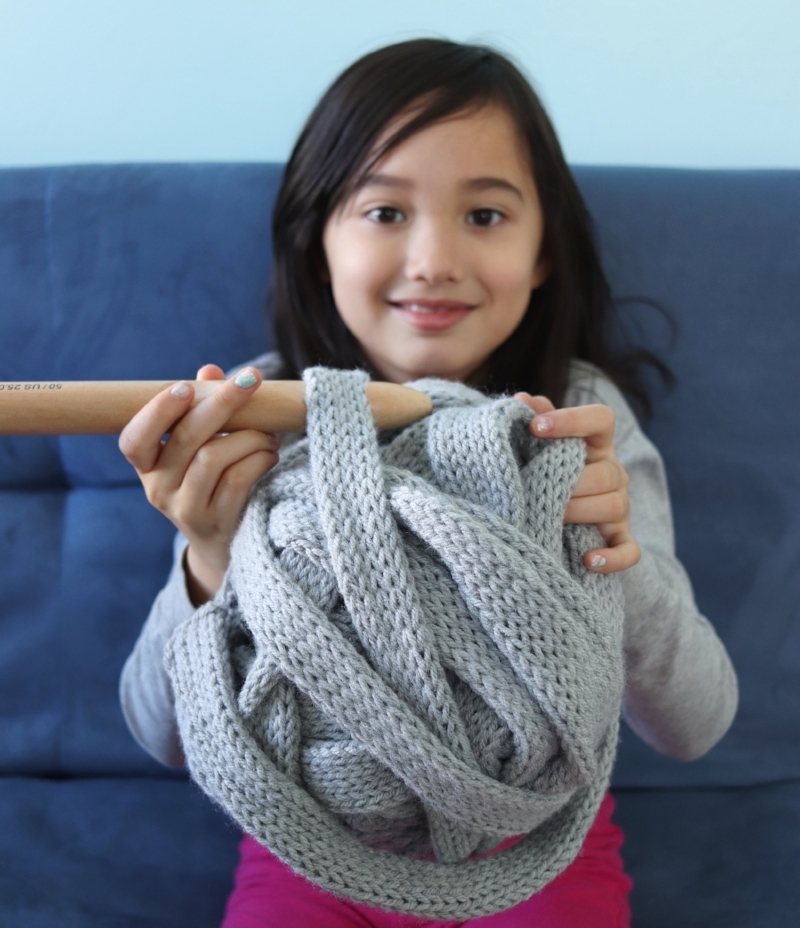
The super big knitting (extreme knitting) is trendy these few years. The yarn is so big you have to knit with fingers or arms. The process is super quick and the final product looks really warm and eye-catching. There is only one problem. A good quality super bulky yarn is hard to find or costs a lot. A blanket might need hundreds of US dollars just for the cost of yarn and shipping. Cheaper quality yarn might break off easily, feel scratchy or shed a lot. That is why it might be worth your time to knit your own bulky yarn on a knitting machine. It is a great stash-busting project and the finger knitting part is fun and fast.
1. I-Cord
To make a small size tube yarn, I-cord knitting is a good choice. Does not matter what brand of knitting machine you have, if you can do "partial knitting", you can knit an I-cord. A Ribber is not required for I-cord making. Most Japanese bed machine has a "Part" button or lever on the knitter carriage. You might need to check manual for the partial knitting.
To make an I-cord, you cast on a few stitches according to the thickness of I-cord you like. 3-6 stitch is a good start. Do an E-wrap cast on or any cast on method you like, knit one row and hang proper weight, then set the preferred tension and Part button on one side (does not matter left or right) so it only knits in one direction. Just keep knitting and you will see a tube forming.
There is a little gap when stretched out. Once it is off the machine, you don't notice the gap unless you have too many stitches. I tried 10 stitches cast-on of the worsted weight yarn on my bulky Brother 260, and the gap is too obvious. So for bigger size tubes, we have to do circular knitting with a Ribber.
2. Circular knitting with a Ribber for bigger size tube
If you have a Ribber, you can make any size seamless tube. I use a simple e-wrap cast on for both beds. Wrap the yarn counterclockwise for the knitter needles and clockwise for the ribber needles. Knit one row with the desired tension. Hang enough weight. Set circular knitting: knitter and ribber carriage will have the part button set oppositely. It does not matter which one is left part or right part. I prefer setting to knit on the ribber first (so the side near the knitting is normal knitting and the push the part button on the opposite side for the Ribber carriage), and set the knitter carriage the opposite for circular knitting. See my video below.
This cast on creates a closed end tube. If you like open end tube, you can start with a waste yarn for a few rows and then change to the main yarn.
3. Stuffing a big tube
You can also stuff a big tube with polyester or cotton fillings as you knit. After a certain amount of rows, drop the ribber and stuff the tube. It is more work, but the final tube looks more rounded than ribbon-like. You can make a throw pillow quickly with a big puffy tube yarn.
Enjoy the video below
If you rather buy the yarn...
I would avoid Roving yarns because they break easily. Here are some yarns I would use personally. (disclosure: affiliate links)
1. Lion Brand Wow yarn. A reliable brand, big size yarn, and fair price.
2. Good amount of 2.2 pound of yarn. Not the cheapest but the quality looks decent.
3. Red Heart is another big brand. You can use 25mm needle or hook.
OR, to buy needles and crochet hooks
1. 30mm circular knitting needle:
2. Circular knitting needle set of 3 sizes:
3. Crochet hook set in 3 sizes:


